Thursday, October 3, 2019

New Campaign: Modern Pacific


I have started a new campaign, this one will be set in the Pacific and South China sea. The rules will be Harpoon 4. I may add land combat at a later date


Modern Naval Campaign
Overview

It is 2021, the world is has entered an economic downturn. Many major powers face increasing unrest and political troubles at home. The US looks to a more internal focused policy after damage from the trade war with china took its toll. China also faces major economic problems from the trade war and increasing isolation after the brutal subjugation of Hong Kong.

Other nations too have economic and political issues, but these are less drastic. As world opinion turns on china and economic hardships effect its people, the chines government become more bellicose. A declaration that all ships using china's (claimed) territorial waters must get permission, or pay a fine is the result. Many nations refuse to do this. At first the declaration is mostly unenforced.

Near the Scarborough Shoal china has once again banned not only fishing by Phillapine vessles but also transit and has expanded the area where these rules apply. The recent harassment of these vessles has caused the Philapine navy to send a vessle to carryout a freedom of navigation mission through this claimed area.


Scarborough Contact

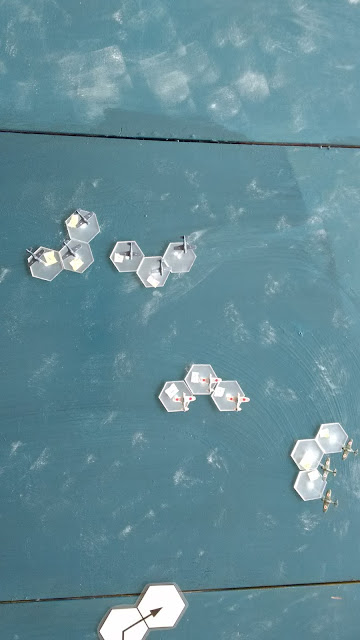
2 Philippine patrol boats, PS-28 BRP Cebu and PS-20 BRP Magat Salamat, are conducting a freedom of navigation manoeuvrer through china's declared exclusive zone around the Scarborough Shoal. Their direction and location have been reported and a single Chinese Type 053 (Jianghu IV) is attempting to intercept. The Philippine air force also has 1 KAI golden eagle on standby.

Objectives
         Philippines
                 Strategic
                        Complete freedom of navigation manoeuvrer, drive off any aggressor. Do not  
                         loose any ships.
                 Tactical
                        Do not loose any ships, inflict damage on any aggressor.
          China
                  Strategic
                         Prevent Enemy ships entry into security zone. Avoid damage
                  Tactical
                          Prevent enemy ships entry into security zone, do not loose the ship.

The contact at 3.15pm local time

The 2 Philippine ships continued on there straight course and were intercepted by the Chinese frigate. Both had radar contact, the Chinese ship matched the Philippine ships course at just over 6 nautical miles away and broadcast warnings. The Philippine ships continued on their course.

At 4.06 the Chinese ship fired a warning shot. The Philippine captains did not react and continued.

At 4.10 the Chinese ship open fire with its main gun. The first rounds missed and the Philippine ships under the assumption that this was another warning did not react. The second set of rounds struck the Magat Salamat, the shells doing some damage to the smaller ship.

At this point both Philippine ships turned towards the Chinese ship in order to get into range. Over the next 2 minutes the Chinese ship continued to fire and miss the smaller ships. At 4.14 a second round struck the Magat Salamat and this time did significant damage taking out the radar, main gun and rudder.

As the Magat Salamat, now unable to manoeuvrer effectively, tries to disengage the Cebu starts to fire its main gun. Once again both ships miss several times.

4.17 A round from the Cebu strikes the Beihai doing very light damage. Having taken a hit the chinese ship responds with its missles.

4.18 1 anti ship missile is launched towards the Cebu.

4.19 The Cebu misses in its attempt to bring down the missile and is struck. The small ship is knocked out of the fight and begins to sink.

4.20 The Beihai launches a second missile towards the Magat Salamat.

4.23 The Magat Salamat is struck and sunk by the missile.

4.31 A KIA golden Eagle which had been prepared earlier arrives in the area. It locates the Beihai on Radar and proceeds towards the target. At a distance of around 10 nm it launches 2 maverick missiles. As they approach the Beihai, 1 is shot down by the defensive anti air fire. The second strikes the ship. The plane then launches the second set of 2 missiles both of these make it through the AA fire and strike the Beihai.

4.35 The Eagle leaves the combat area having used its payload. The Beihai has been heavily damaged but is still able to sale and makes it's way back to port.

Result
Tactical victory for China.
The successful enforcement of the Security zone shows that china is not bluffing. Also the easy destruction of 2 enemy ships demonstrates the power of the Chinese navy. However the damage inflicted by 1 plane shows the danger that a lack of AA or fighter support can have. The distance from the mainland and the airbases there shows a possible weakness. The limited modern elements of the south east Asian countries could be a significant threat if grouped together.

Political Results
The result is not good for the president of the Philippines. The loss of 2 ships (even if they were the oldest in the fleet) will not go down well with his nationalist supporters back home. However, with this event he has demonstrated the threat that china poses and this may help unify the ASEAN nations at the emergency meeting soon to be held. The fact the the US has only offered words rather than action also helps this cause.

In China the result is greeted with celebration by the public and repeated on the public news broadcasters. This is what the government hoped for as people, for a time, forget the economic troubles. The threat posed by the ASEAN as a group has been noted though and by threats and bribes attempts will be made to split them up. Also the US's lack of action is encouraging. Bigger plans can now be carried out with confidence.

Wednesday, September 11, 2019

August 22 Carrier strikes and results

Turn 15 day (August 18)

The Japanese destroyer transports are ordered back and join the larger transport force which continues towards the islands

skip time

Turn 19 day August 22

The main Japanese force enters the area to clear the way for the transports

4 is the advance/ support force
5 is the striking (carrier) force
6 is the Vanguard force
7 is the diversionary force

US numbers are1 for Air Support Force (Saratoga), 2 for Task Unit from old TF 16 (enterprise), 3 for Task Unit under Rear Adm. Noyes (wasp)

The weather is windy

Scout planes from both sides spot almost all the main ship groups, except the Japanese diversionary group. All ships launch attack groups

Shokaku attack force 15 fighters 9 torpedo bombers, 14 dive bombers (target US 1 (Saratoga))
Zuikaku attack force 15 fighters 27 dive bombers (US 2 (Enterprise))
Ryujo attack force 12 fighters 21 torpedo bombers (US 3 (Wasp))

The US forces all target the stiking carrier force
Saratoga attack force 15 fighters 18 dive bombers 9 avengers
Enterprise attack force 15 fighters, 18 div bombers 9 avengers
Wasp attack force 15 fighters, 18 dive mobers, 6 avengers

The Zuikaku force cant find Enterprise and so moves to attack the Saratoga force

cap for Shokaku attack on Saratoga 15 wild cats
cap for ryujyo on wasp 12 wild cats
cap for combined attack on japanese carriers 24 zeros

Battle 1 The American attack on the carriers

I will split this battle into 6 parts because of its size.

Part 1
8 wild cats, 9 bombers, 6 torpedo bombers vs 6 zeros. 1 junior ace on each size.

This battle was dominated by poor dice rolling.

At first the forces moved towards each other and some good cards saw a zero squadron get behind the bomber formation and fire. This caused 1 bomber to explode causing 5 torpedo bombers and 2 dive bombers and 1 zero to loose control. (only the dive bombers and 1 torpedo bomber would regain control over 4 turns!)

Other than this 1 zero was shot down and some damage done to other but the number of times a huge amount of fire produced no result was crazy.

In the end 1 zero was shot down, 1 crashed, 1 damaged,

The US lost 5 torpedo bombers and 1 damaged fighter,

9 dive bombers reach the fleet

Part 2
6 wild cats 9 bombers, 3 torpedo bombers vs 3 zeros

At first the US pilots fail badly, many missing and jamming there guns. This allows the the Zeros to inflict some damage on the first pass. After this as the zeros turn to chase the bombers the US fighters can get behind and shoot 2 down. More bombers are lost or damaged. In the end 2 wild cats and 1 of each kind of bomber are shot down with another bomber damaged and forced back to base

7 dauntless and 2 avengers reach fleet

2 wild cats, 2 bombers and 2 zeros are lost

both pilots who bailed are rescued.

Part 3
9 wild cats, 9 bombers, 6 torpedo bombers vs 6 zeros

The US starts badly again and 2 fighters are shot down on the first pass, 3 zeros chase the bombers while 3 engage the cap, both fail to achieve much as the bombers manoeuvrer well

7 dauntless and 5 avengers reach the fleet

2 dauntless, 1 torpedo bomber, 2 wild cats and 3 zeros are lost

Part 4
6 wild cats, 9 dive bomber and 6 torpedo bombers vs 3 zeros.
Its starts well for the zros as they claim 2 bombers but soon 2 are shot down by lucky long range fire and the last one breaks off. 1 ace is forced to bail and is lost at sea

Part 5
9 fighters, 9 dive bombers 3 torp vs 3 zeros

The zeros aproach close to the bombers and fire from the bombers damages all 3, the rookie looses control and crashes, the bombers are safe

part 6
the small fighter escort for bombers and 2 aces on the Japanese side seem to show a more even fight, but turret fire from the bombers forces 2 zero off with damage. The last ace shoots down 2 before he is out of ammo.

After all the battles most of the bombers have made it through, casualties between the US and Japanese are about even.

The strike

The many US bombers approach the carrier group, most are able to target the carriers with a few going after destroyers.

The first waves of dive bombers drop a large number of bombs scoring 2 hits on both carriers. IJN Zuikaku takes a penetrating hit which destroys is forward hanger and another damages its forward flight deck. Shortly after aviation fuel ignites and the stricken carrier is destroyed by a raging fire. Vice admiral Chunichi Nagumo does not escape his flag ship.

The Shokaku has both its flight decks badly damaged and its hull is also battered. However the crew fight the fires and are able to save the ship. They should be able to recover some of the aircraft currently in the air if they work hard to repair the decks.

One destroyer, the Kazegumo takes a bomb hit which damages its hull and knocks out 2 of its 3 gun turrets.

Then the torpedoes dropped by the torpedo bombers arrive, but once again American torpedoes fail and only 1 hits. It strikes the Makigumo, another destroyer. It suffers hull damage and the magazine ignites, the crew fail to stop it and the ship is destroyed in a fireball.

The cost to the US is 12 lost bombers, 9 damaged and 26 ok.
Dive bombers are 4 lost and 5 damaged from 19

The bomber wings from Zuikaku and Shokaku reach the Saratoga one after another. The CAP are largly rookies and are overcome easily by the veteran pilots of the Japanese carriers. The heavy AA is another matter

Shokaku looses 7 dive bombers and 1 torpedo bomber with1 damaged out of 15 and 12

These do heavy damage to a cruiser and sink a destroyer but only hit one flight deck on the Saratoga.

Following up, the many dive bombers from Zuikaku arrive. The suffer even worse from the AA loosing 7 dead and 6 damaged from 27. The survivors do more damage to the cruiser and hit the Saratoga 3 times doing severe hull damage and starting a hanger fire. The massive hull damage is too much and fire consumes the ship. Vice admiral Noyes does not make it off his flagship.

The strike on the Wasp by the Ryujyo's torpedo bombers leads to the loss of 8 shot down and 4 damaged. 1 torpedo strikes the carrier, knocking out its engineering and doing massive hull damage. Another torpedo strikes the Salt Lake City which also takes significant hull damage and the loss of its forward guns.

The final results are the loss of 1 carrier a side, and the crippling of another on both sides. This leaves 1 carrier each with an active wing remaining.

I am also now quite bored of this campaign, the many repetitive air battles got old fast. I may do one final naval battle if the Japanese surface force can catch any of the US forces. It looks like the campaign will result in a draw.

Wednesday, July 31, 2019

August 16 Air battle, (Bag the Hun battle report)

2 fighter sections engage 2 sections of CAP
The transports finish unloading and leave the area.

August 16th air battle, 2 sections of Zeros vs 2 sections of Wild cats

The sections approach each other and the leading planes exchange fire, causing little damage except for the gunsight on one of the zero leaders. The planes fly past each other on one side Blue zero section gets behind US red and on the other US white gets behind zero green.


In the turn to follow zero green, The rookie leader and number 2 of US white section fail to keep up, with number 2 loosing control of his plane. This leaves only white 1 behind the zero section. US red section has zeros approaching from the rear. A hard turn could help, but with one of the wing men a rookie the change of loosing him is high, should he fail, with a full zero section behind, his chances are slim. Thus the red leader tries a daring manoeuvrer, he turns gently towards the other zero section and US green and flies through them. His section dodges all the planes, both US and Japanese. The following Japanese section does the same thing. Both wing men avoid the wing men from the other section. The leaders are not so lucky as they clip each other. It is a disaster, blue leaders plane stats to fall apart as a wing sheers off. Green leaders plane is engulfed in a fireball. Which cause 3 of the 4 wing men to loose control.

Now the tides have turned. Over the next few minutes US red section will shoot down 2 more Zeros.

Meanwhile, of the remaining 2 zeros, one will struggle to regain control, and after taking damage break off.

The other follows US white leader who is now alone, the other rookie having struggled with the controls so much he leaves the area. A burst from the Zero causes critical instrument damage to US white leader who attempts to break off. The zero follows him and puts round after round into his plane. Before his other wingman can arrive to drive off the zero US white leader will take heavy damage to both wings, his cockpit and have his flue lines damaged. However he makes it back to the carrier alive and still in his plane.

The result is 4 downed zeros with 1 more damaged. The US losses are 1 damaged fighter. Group leader C. Powell has also become a junior ace after his great performance. The second ace in the task force and both from the same carrier.


Wednesday, July 24, 2019

Guadalcanal Campaign August 11- 17 and battle report

 The events of the first part of the campaign are coming to an end. Japanese reinforcements will start to arrive from th 18th onwards.

Turn 8 day (august 11)

Weather is fine
US forces continue to unload
US sub continues to patrol
5 fighter planes sweep over landing zone, intercepted by 4 sections of US fighters and abort mission.

Turn 9 day (August 12)

Weather is fine
2 sections of fighters and a bomber section attack transports, driven off by 5 fighter sections of CAP
Turn 10 day (August 13)

Cloudy and windy
Weather reduces air activity

Turn 11 day (August 14)

Weather is fine
Japanese air attacks are no more than scouts who flee when encountered.

Turn 12 day (August 15)

It is raining
A large air attack of 6 fighter sections and 1 dive bomber section attacks, intercepted by 5 fighter sections of cap. At 20,000 yards.

Part 1 of 2. 2 cap vs 3 zero sections

Turn 1
The planes manoeuvrer and 1 zero section goes past the US sections.

Turn 2
The zero section turns around and attacks green from the side causing a catastrophic structural failure to fighter 1 and damaging the wing of the leader. US red fires at Japanese red section but only does light damage. Japanese green section misses completely and red section does wing damage and cuts a fuel line of US green leader.

US red leader then fires again at Jap green 2 and causes the plane to explode. The damage causes one Japanese plane and US red 1 to lose control. US green 1 bails from his stricken aircraft

Turn 3
US red tails a Japanese section but is almost immediately thrown off. US green leader is shot at by the swarming zeros taking more wing damage and the critical instrument damage and starts breaking off. The rookie of green section is also hit by fire first getting a fuel line cut and then exploding in a fireball which kills the pilot. The shooter, Zero green leader looses control due to the debries.

Turn 4
The planes manoeuvre and fire but all miss.

Turn 6
The zeros continue to fire and another US fighter is crippled and the pilot bails. One of the other US planes, having lost control in turn 2 has now failed 4 times to regain control and bails before he hits the sea. One of the Japanese planes which had also lost control fails for a 5th time and hits the ocean.

The result is:
2 zeros down, 1 damaged, 5 cap down, 1 damaged. (A. Phelps, rookie, KIA) (B. Kelly POW) (W. Cambell Lost at sea). A dark day for the carrier group.

Part 2 of 2. 3 CAP vs 3 zero sections and 1 bomber

Turn 1
The planes rapidly close with each other. One of the Japanese sections swings around and on the approach causes critical instrument damage to US blue 1. However, a mistake has left them in the sights of US green leader who takes his chance. Yellow leader of the zero section erupts in a fireball and this causes 2 US planes and 1 Zero to loose control in the crowded skies.

Turn 2
Next a swirling and confusing dogfight erupts and the planes begin to separate. Various planes get tailed and then manoeuvrer to loose them and take moderate damage such as wing damage. A lucky shot by Zero blue 2 kills the pilot of US red 2.

Turn 3
The planes continue to manoeuvrer and fire but all miss. 2 planes from US blue section begin to chase the bomber section and are in turn chased by a Zero section. The other planes continue to dogfight.

Turn 4 and onwards
I got confused in my notes and was pretty tired. Basically next many of the planes continue to fight while US blue goes after the bombers. Blue 2 his hit by the pursuing zeros and explodes, but blue leader shots down 1 bomber and damages a second. Before the zeros can get blue leader. One of the US fighters from yellow section catches up and makes the zeros break formation as well as shooting down 1. This lets Blue leader finish off the last bomber. As the planes run out of ammo, 4 fighters apiece remain in the air.

The result
2 zeros down, 2 bombers down 1 damaged. 2 CAP down (Z. Chang KIA) (P. Drummond Section leader KIA). The day has been hard for the carrier fighter force, 5 dead pilots and 7 lost planes is a heavy loss. The only comfort is 4 zeros also went down as did all the bombers. The transports are safe.

Turn 13 day (August 16)

It is raining
2 fighter sections engage 2 sections of CAP (battle report later)
The transports finish unloading and leave the area.

Turn 14 day (August 17)

it is windy
Japanese destroyer transports enter from the north. A large Japanese transport fleet has also left its base and will soon arrive in the area, A carrier group will also depart soon.

first battle report photos


Second battle report photos


Wednesday, July 17, 2019

Guadalcana campaign August 9 and 10 and air strike battle report

 Note. I didnt record the results of the Tulagi battle as it mostly went as expected and i was eager to be done with these land battles. mostly because i messed up my land board and it is too uneaven for the terrain. needless to say the US forces won with their massive advantage.

Turn 6 day (August 9)

The weather is fine
The US sub continues to patrol.
The Japanese land forces stop withdrawing.
The US task force continues to unload
2 dive bomber sections and a fighter attack the transports but are intercepted by a large number of fighters and abort the mission before reaching their target.
Once again the Japanese submarine spots the task force it has been following.
I-123 fires a spread at the Task Unit from old TF 16, 1 of which strikes the enterprise.
The submarine is then destroyed by depth charges.
The torpedo strikes the Enterprise carrier but at a bad angle and while there is some hull damage the ship escapes mostly intact.

Turn 6 night

The weather is fine.

The US forces continue to unload.
The US sub continues to patrol
The only Japanese forces in the theatre now hunker down and await reinforcements.

Turn 7 day (august 10)

It is cloudy
Once again a large air force attacks the transports They are intercepted by 2 sections at 25000 yards.

So it is 2 sections of CAP vs 3 fighter, 3 dive bomber and 1 torp bomber sections.

The 2 Cap sections are White 1 from the USS Wasp and the Saratoga's 2nd fighter red section. The Saratoga's section is lead by a vet and has 1 average pilot and a rookie. The wasp's section are all average pilots. They face 3 zero fighter sections all average and lead by veterans. These are
escorting 3 dive bomber sections and 1 torpedo bomber section. It will be a hard fight for the Americans. They start coming head on to the bombers

Turn 1
All the planes move up, some long range fire from the Japanese fails to do any damage.

Turn 2
The planes manover, US white moves over the bombers and directly behind them but is caught and tailed by a zero section. US red moves around to the right in a tight circle pursued by 2 zero sections. The hard manoeuvrer causes the rookie to test to keep formation which he does.

The leader of the Zero section behind US white fires on the leader and the long burst shreds the planes fuselage causing it to begin to spiral down to the sea. US red takes a lot of fire but only minor damaged is caused. In turn a burst of fire from US red leader (H. Jones)causes one of the torpedo bomber pilots to loose control.

Turn 3
The leader of US white (W. bailey) bails successfully from his stricken plane. Fire from the Japanese section behind US red causes engine damage on number 1 (S. Roche) and misses the others. One Japanese pilot jams his guns.

The 2 remaining planes from US white section split up and both turn to follow the torpedo bombers. The get behind them and both fire. White 1 (J. Thompson) causes damage to the fuel line while white 2 (N. Powell) accurate fire causes the bomber to explode causing number 3 to loose control. The leader still struggling from the earlier fire fails to regain control.

US red leader has now moved up behind the bombers a good distance from the escorts, CAP and torpedoes bombers behind him. His accurate fire causes engine damage to one and causes another to explode causing another to loose control.

The green zero section fires on US white 1 but misses with 1 pilot jamming his guns. Another Zero sections on the rookie of US red section (J. O'Rorke) The cockpit is shredded and O'Rorke is KIA.

Turn 4 and Turn 5

Red leader having used all his ammunition leaves the battle field, seeing behind him 2 of the bombers who he caused to loose control and the one whose engine he damaged smash into the sea.

The Zero section behind US white 2 damages the plane enough to force the pilot to bail as it heads towards the sea.

2 sections pursue White 1 (J. Thompson) as he makes his escape and miraculously he dodges all their fire with nothing more than his gun sights and windows damaged. The pursuing zeros, having run out of ammunition break off.

The surviving 6 dive bombers and 1 torpedo bomber make their attack runs on the transports.
The torpedo bomber is shot down almost immediately. The dive bombers make runs on the USS Fuller and the USS Alhena. One dive bomber from each is damaged. The Fuller is struck amid ships by a penetrating bomb which causes extensive damage and sinks the ship after a short while. The Alhena is hit in the stern with the bomb reaching the 2 stern cargo holds. A large fire takes hold but is eventually put out.

The loss of the Fuller take with it 2 weapons platoons and 2 marine platoons. The Alhena fire costs the landing forces a weapons platoon, an artillery platoon and 2 tanks. The losses among troops would have been much greater if they had not already mostly been sent ashore in the landings.
However, the damage to another of the cargo ships of which there are only 5 has cost more heavy equipment. Already 25% of the tanks and a portion of heavy artillery have been lost.

The skill of red leader (H. Jones) has seen him reach the level of a Junior ace, the first one among all the carrier pilots.


Monday, July 1, 2019

Battle of Tanambogo (Blitzkrieg Commander 3 Battle report)


The battle of Tanambogo.

This is a quick report of the battle for the second island, Tanambogo. It takes place the day after the first battle of Gavutu.

The US forces have decided to continue with their swift assaults with another one the next day. Again there will only be light support and this time only 1 tank as the previous losses have not yet been replaced.

The battle was a simple affair with the Americans storming up the beach and across the causeway. The Japanese defenders, out numbered by superior troops were only able to inflict light casualties before being overwhelmed.

This lead to another swift victory and Gavutu-Tanambogo has now been secured, though this outcome was never in doubt.

The next battle will be for Tualgi, which is a slightly bigger affair and takes place at the same time as this.

These two battles cost the Marine parachute regiment 18 of it's 50 or so squads and as such the regiment will be withdrawn from the front line now to recover its strength.

The Japanese forces lost all men on the islands, a construction battalion, an airbase unit and elements from a special landing force.

Here are some photos of the battle.


Monday, June 24, 2019

Battle of Gavutu (battle report Blitzkrieg Commander 3)


This is the battle report from the first landings at Tulagi and Gavutu-Tanambogo. This entry will cover Gavutu on the 8th of August. This battle will use Blitzkrieg commander 3 rules, but i am using 1 base to represent a squad rather than a platoon and made some small other changes to suit this scale.

It took me a while to get all the terrain ready so this report is a little late and behind in the campaign, but never mind. Also my boards are a bit too rough (I should not have used the cheap sand) so everything is not flat on the table.

Anyway, the US command has decided to launch a quick attack without much in the way of a preparatory bombardment. They attack will all be focused on Gavutu first Attacking the island are the 1st marine parachute battalion with support. They have been divided into 7 reinforced platoons for the purpose of the battle with 2 company commanders and 6 tanks supporting them.

The defenders are made up of elements from the Yokohama Air Group, the 3rd Kure Special Naval Landing Force and the 14th Construction Unit. I have divided them into 2 small platoons of veterans with support, 1 very large conscript platoon and some AA squads.


The starting deployment sees the Japanese conscripts in position around the base, river and dock, 1 veteran platoon in fortifications along the coast with support weapons behind in the forest and 1 veteran platoon back up the road at the command point.

The US forces all start making their way through the water to the beach. There are also 2 machine guns on the edge of Tanambogo which cover the beach for the Japanese.

The light early bombardment takes out 2 conscript squads and a veteran support machine gun.

The game


In the early game the US forces advance to the beach, a light fire suppressing a few of the defenders, with supporting fire from the ships, well aimed by a forward spotter takes out a few squads. The return fire is only able to suppress a few squads.


As the game goes on, the US forces push up to the outer defences, having shot most of the defenders off of their positions. More accurate naval fire also helps. The Marines are making good speed and for relatively light casualties. The fight is also breaking into 3 areas, the village, where are remaining conscripts are grouping up. The dock  where only a couple of squads remain and the beach where most of the veterans have been forced out of their fortifications.

At this time the other Japanese veteran platoon is making its way down the road towards the beach.

The US forces in the village area make a push to force out the Japanese defending it.

Destroying 2 conscript squads, but loosing a tank in the process.


Now the Japanese defences start to fold as the conscripts and veterans beginning to fall in large numbers. However the US is also taking losses, especially from close assaults. The Stuart tanks are particularly vulnerable.


As the beach defences fall the marines charge the support weapons in the forest.

While the village is almost completely secured for the Americans.

However in the center a mad charge results in heavy US losses and most of the platoon fall back.

However it is not enough and with the original beach defenders wiped out and the other veteran platoon damaged by naval gun fire the game ends.

The result is a rapid victory for the Americans taking no more than half a day.

Losses are total for the Japanese on Gavutu.

The US losses are 12 marine squads, about 25% of the original landing forces and 5 of the 6 tanks.

This was a solid US victory, with the smaller Japanese force on Tamabogo not looking good for tomorrow.

Meanwhile there is a large battle going on on Tulagi which I will fight soon.

Wednesday, May 15, 2019

Day 5 (August 8) and Air strike (Bag the Hun battle report)

 
Turn 5 Day (August 8)

The weather is fine.

US aircraft fail to spot the withdrawing remnants of the South-east area force.

The Japanese air forces basted at Rumbal launch a significant air attack made up of 3 sections of fighter aircraft protecting 3 sections of dive bombers and 1 of naval bombers. These are aimed at the landing sites and so do not need to search for targets, they are intercepted by 3 sections of carrier based fighters at a distance of 25000 yeards. The submarine I-123 sights the Task Unit from old TF 16 again but again cannot get into a good position due to the escorts.

The transports are divided into north and south sections. The north is protected by the Cruiser USS Vincennes and by destroyers USS Blue, Henley and Ellet. The south is protected by the anit-air cruiser USS San Juan and destroyers USS Hull, Buchanan and Monssen.

Transport group Yoke is to the north and X ray to the south.

The Battle

The Japanese air strike made up of 3 dive bomber sections and 1 torpedo bomber section with 3 fighter section escorts is intercepted by 3 US fighter sections a good distance out from the transport ships. The fighters are all operating 1 height band above the bombers at the start. The weather is clear.

The US fighters sweep in from the front left and the Japanese escorts move to engage but are caught slightly out of position.

The US CAP sweeps in from the top while the Japanese escorts begin to react.


The first shots are exchanged by both sides head on but all fail to hit and one pilot jams his guns. (gun jamming will be a recurring theme this game.)

The US red section is able to get behind the torpedo bombers but are shook off by tail gun fire and fail to hit. However, US white section coming in from the left fires and one of the bombers suffers a catastrophic structural failure and begins to fall out of the sky as the crew bail out.

One of the torpedo bombers (center) is shot down.


Next a chaotic fight in the centre behind the bombers erupts. The plains all fire and manoeuvre The result is some jammed guns and light damage. US Red section fires again on the torpedo bombers and red leader shreds the cockpit of one, killing the pilot. Japanese Green 2 suffers critical instrument damage and begins to withdraw from the battle. US red leader suffers a cut flue line.

A second torpedo bomber is shot down and a Japanese fighter is damaged (right)


In the next turn US red leader finishes off the last torpedo bombers causing it to fall from the sky, then begins to escape the area as the planes have all used their ammunition. Also fire from japanese fighters causes US yellow leader to suffer engine damage. This plane is flown by the carrier's group leader. 

The last torpedo bomber goes down as US red section tries to escape (top left).


Now the fight seems to break up, US red section flies off to the upper left and is pursued by the Japanese red section. US white sections continues to follow the bombers and is in turn followed by the Japanese green section. Finally, the Japanese and US yellow sections begin a small dog fight as one plane from each tries to get back to base.

The fight spreads out.


The faster Zero fighters catch up with US red section and the leader is hit, suffering a catastrophic structural failure the pilot bails out as the planes falls into the sea. In the centre, one of US white section has his wing damaged by the Japanese behind him. However one of the bombers is shot down by White 1. Behind the main fight, one of the Japanese fighters is hit and the pilot wounded.

US red leader is shot down


The US red section's remaining fighters now split up and the unfortunate red 1 is followed before being shot down. The pilot will bail out before hitting the water. Meanwhile, US yellow leader's engine will give up and the fighter group leader will be forced to bail out.

 US red 1 is also shot down.


US white section continues to follow the bombers while the Japanese yellow section can do little as they miss and use all their remaining ammunition. White will shot down two more bombers before they too run out of ammo. All the other sections now begin to break off due to damage and ammunition problems.

US white section begin to take down bombers as the escorts are out of ammo.


The remaining dive bombers approach the vulnerable transports. They seems to target the USS President Hayes which carries mend and equipment for 11th marines and the USS Formalhaut which is carrying heavy equipment. However, the heavy fire from the USS San Jose and other ships will shoot down 3 of the bombers and damage the other 3 during the fight. 

The bombers reach the transports


Despite this some bombs are successfully dropped, 2 of which hit, 1 on each ship. The damage is severe and the President Hayes will swiftly sink, while the Formalhaut will take longer before sinking beneath the waves. 

The bombers attack.


Both ships have already begun to unload with many of the men from 11th marines already ashore. Still 2 platoons and a weapons platoon are lost with the ship. The heavy equipment on the Formalhaut takes longer to unload and the losses are heavier with 2 platoons worth of artillery and 6 light tanks going down with the ship.

The last 3 bombers make their escape as 2 ships are left to sink.


The conclusion

This was a chaotic battle with the US CAP at a relative numbers disadvantage, however they did well taking out half of the bombers before they got to the ships. Of the 12 bombers and 9 fighters sent by the Japanese only 3 damaged bombers will return. The fighters got off more lightly with only 1 damaged.

As for the US CAP 3 of the 9 fighters went down with all pilots successfully bailing, despite being in friendly waters on a clear day the results were not good for the pilots. Red leader (L. Miller) from USS Wasp was not recovered and so declared lost at sea. Red 1 (M. Cox) who is a veteran pilot is recovered successfully. The worst news is of the group leader from the US Enterprise (J. Sanders) he is not recovered by the US and is in fact washed ashore where he is captured by patrolling Japanese forces.

The loss of 2 transports in not too terrible, but if this becomes a regular occurrence things could become bad. The loss of heavy equipment was the worse of the two losses.

I made some small rules mistakes again, but less than last time. With such a large number of planes on the table I need to improve my way of keeping track of them.